
6 Holiday Cookie Recipes

December 2020
Not only is receiving a box of homemade cookies something special, it’s also a great way to gift on a budget. Below are 6 holiday cookie recipes that are sure to fill homes with some holiday joy.
Maiz Morado Funfetti Biscotti

These biscotti have a little twist. They have maiz morado flour (purple corn) giving them a beautiful purple color.
Recipe
Yield: 20
Ingredients
4 Tablespoons cold, unsalted butter
3/4 cup granulated sugar
2 large eggs
1 1/2 teaspoon vanilla extract
1 1/2 cup all purpose flour
1/2 cup purple corn flour
1 teaspoon baking powder
1/2 teaspoon salt
3 Tablespoons nonpareils or sprinkles
3/4 cup white chocolate
Directions
Preheat oven to 350 degrees F. Line a baking sheet with parchment paper.
In a large bowl using a wooden spoon, or in a stand mixer fitted with the paddle attachment, beat the butter and sugar together until creamy.
Add the eggs and vanilla extract. Mix until well combined.
In a separate, medium bowl, whisk together the all purpose flour, purple corn flour, baking powder and salt.
Add the flour mixture to the wet mix. Combine on low speed until just combined, scraping down the sides of the bowl as needed. Add nonpareils.
Divide the dough in half and shape into 2 logs that are about 8 inches long and 4 inches wide. It is a sticky dough. If you find it difficult to handle, place the dough in the fridge for 20 minutes and try again.
Place the logs on the prepared baking sheet. Use your hands to flatten the dough logs until they are about 3/4-inch thick. Gently press the sides and ends of the logs to even them out and flatten them.
Bake for 20-25 minutes, until lightly golden and the center of the logs is almost firm and bounces back when touched.
Let the logs cool on the baking sheet for 30 minutes.
Use a sharp knife to cut the logs into biscotti shape, on the diagonal. Press straight down with the knife, rather than sawing.
Place the biscotti, cut side up, on the baking sheet. Bake for 12-16 more minutes, until dry. The centers of the cookies will be slightly soft and will crisp as they cool.
Melt white chocolate in microwave in 10 second increments, mixing after each time, until melted. Drizzle across biscotti.
Store biscotti in an airtight container at room temperature for 1-2 weeks or in the freezer for 3 months.
Chocolate & Vanilla Marbled Shortbread

These beauties are in fact quite easy to make. We love a simple slice-n-bake cookie.
Recipe
Yield: 15
Ingredients
Vanilla dough:
1 stick salted butter, room temperature
1/4 cup powdered sugar
1 teaspoon vanilla bean paste or extract
1 cup all purpose flour
Chocolate dough:
1 stick salted butter, room temperature
1/4 cup powdered sugar
1 cup all purpose flour
3 Tablespoons cocoa powder
Directions
Begin with the vanilla dough: In a large bowl with a wooden spoon or in a stand mixer fitted with the paddle attachment, cream together the butter and powdered sugar. Next, add vanilla paste then flour. Mix until it become one cohesive dough ball. Scrape the sides and bottom of the bowl well and mix once more.
Remove dough, place onto a nonstick surface or with flour on the surface and pat dough into a smooth disk. Set aside.
Chocolate dough: repeat what you did with the vanilla dough only committing the vanilla and adding the cocoa powder. Form into a smooth disk and place it on top of the vanilla dough disk.
With the two disks stacked on one another, cut them both in half. Then fold each of those sections in half and lightly knead creating a marbled effect. Do not knead a lot. Now, stack the two dough balls on top of one another and lightly knead all of it together until you see it all marbled.
In a small, deep, rectangular pan, line the inside with plastic wrap making sure it’s hanging off the sides. Place dough inside the mold so that it takes on the shape as a loaf. Cover the the extra, hanging plastic wrap and place in the freezer for 1 hour or overnight. If you do not have a mold or pan like this, place the dough in plastic wrap and cover and shape it into a 12 in x 3 in log.
Preheat over to 350 degrees Fahrenheit and line a sheet tray with parchment paper. Set aside.
Remove dough from freezer and remove from plastic wrap. On a cutting board, using a sharp knife, slice the dough at about 3/4 inches thick.
Place sliced cookies in the freezer for 5-10 minutes if they softened at all. They should be nearly frozen when entering the oven to make sure they don’t spread.
Place cookies on sheet tray 1 inch apart and bake for 10-12 minutes or until the bottom just starts to brown.
Allow the cookies to cool for 10 minutes.
Store at room temperature in an airtight container for 1-2 weeks.
Christmas Marbled Cinnamon & Clove Shortbread

Recipe
Yield: 12
Ingredients
For the dough:
1 stick salted butter, room temperature
1/4 cup powdered sugar
1/2 teaspoon vanilla paste or extract
1/8 teaspoon clove
1/4 teaspoon cinnamon
1 cup all purpose flour
Royal Icing:
1/2 Tablespoon corn syrup
1 1/2 cup powdered sugar
1/8 teaspoon vanilla extract
2 Tablespoons water
Red food coloring
Green food coloring
Directions
In a large bowl using a wooden spoon or in a stand mixer fitted with the paddle attachment, cream together the butter and powdered sugar until smooth. Add vanilla paste, cinnamon and clove. Mix all evenly.
Add flour and mix just until combined making sure to scrape the sides and bottom of the bowl.
Remove dough and place onto plastic wrap smoothing out the dough into a smooth, even disk keeping it about 1 inch tall. Wrap and place in the refrigerator for at least 30 minutes.
On a smooth, floured surface place the unwrapped dough. Using a circular cookie cutter at 2 inches in diameter, cut out as many cookies as you can. Place those in the freezer. Reform the dough scraps into another smooth disk that’s 1 inch thick and continue to cut out cookies. Repeat with the dough scraps.
Chill all cut out cookies in the freezer for 20 minutes or until completely hard.
Preheat oven to 350 degrees Farenheit and line sheet tray with parchment paper.
Place cookies 1 inch apart and bake on middle rack for 12 minutes or until the bottoms just begin to brown.
Allow the cookies to completely cool before beginning with the icing.
In a small bowl, combine all the ingredients for the royal icing except for the food coloring and mix until fluid. Next, drop 3 green food coloring drops in different areas of the royal icing and do the same with the red food coloring. You want all 6 drops to be separated and staggered.
In a gentle motion dip the top of the cookie in the royal icing making sure the entire top is dipped and with a twisting motion lift up the cookie and lightly shake off any excess icing. With a toothpick, pop any bubbles that form. Place the cookie back on the sheet tray to allow to dry and repeat with the rest of the cookies. You may find you need to add more drops of food coloring to white areas of the icing.
The cookies dry fully in about 15 minutes. Be sure not to mess with them while they dry.
Store cookies in an airtight container for 1-2 weeks at room temperature.
Sesame Thumbprint Shortbread

Recipe
Yield: 24
Ingredients
1 stick salted butter, room temperature
1/4 cup powdered sugar
1 teaspoon vanilla bean paste or extract
1 Tablespoon white sesame seeds + 1 teaspoon for topping
1 Tablespoon black sesame seeds + 1 teaspoon for topping
1 teaspoon poppy seeds (optional)
1 cup all purpose flour
1 teaspoon granulated sugar
1 egg whites or 2 Tablespoons aquafaba
Directions
In a large bowl using a wooden spoon or in a stand mixer fitted with the paddle attachment, cream together the butter and powdered sugar until smooth. Add vanilla paste and both sesame seeds (Not including the ones for the topping). Mix all evenly.
Mix in flour just until combined making sure to scrape the sides and bottom of the bowl.
Form 24 smooth dough balls and with your thumb gently press the tops creating an indentation. Place them in the freezer, not touching, for 15 minutes or until very hard.
In a small bowl beat the egg white until slightly foamy. In another small bowl mix together both sesame seeds and granulated sugar.
With a pastry brush or with the tip of your finger brush egg white over the top of the cookie and sprinkle the sugar and sesame mix into the thumbprint and gently press it all in so it sticks. The egg white acts as a glue. Add more if needed.
Preheat oven to 350 degrees Farenheit and line a sheet tray with parchment paper. If the cookies have softened at all place them back in the freezer until hard.
Bake on the middle rack for 8-10 minutes or until the bottoms just begin to brown.
Allow to cool for 5-10 minutes.
Store in an airtight container for 1-2 weeks at room temperature.
Chocolate Coconut CBD Crinkle Cookies
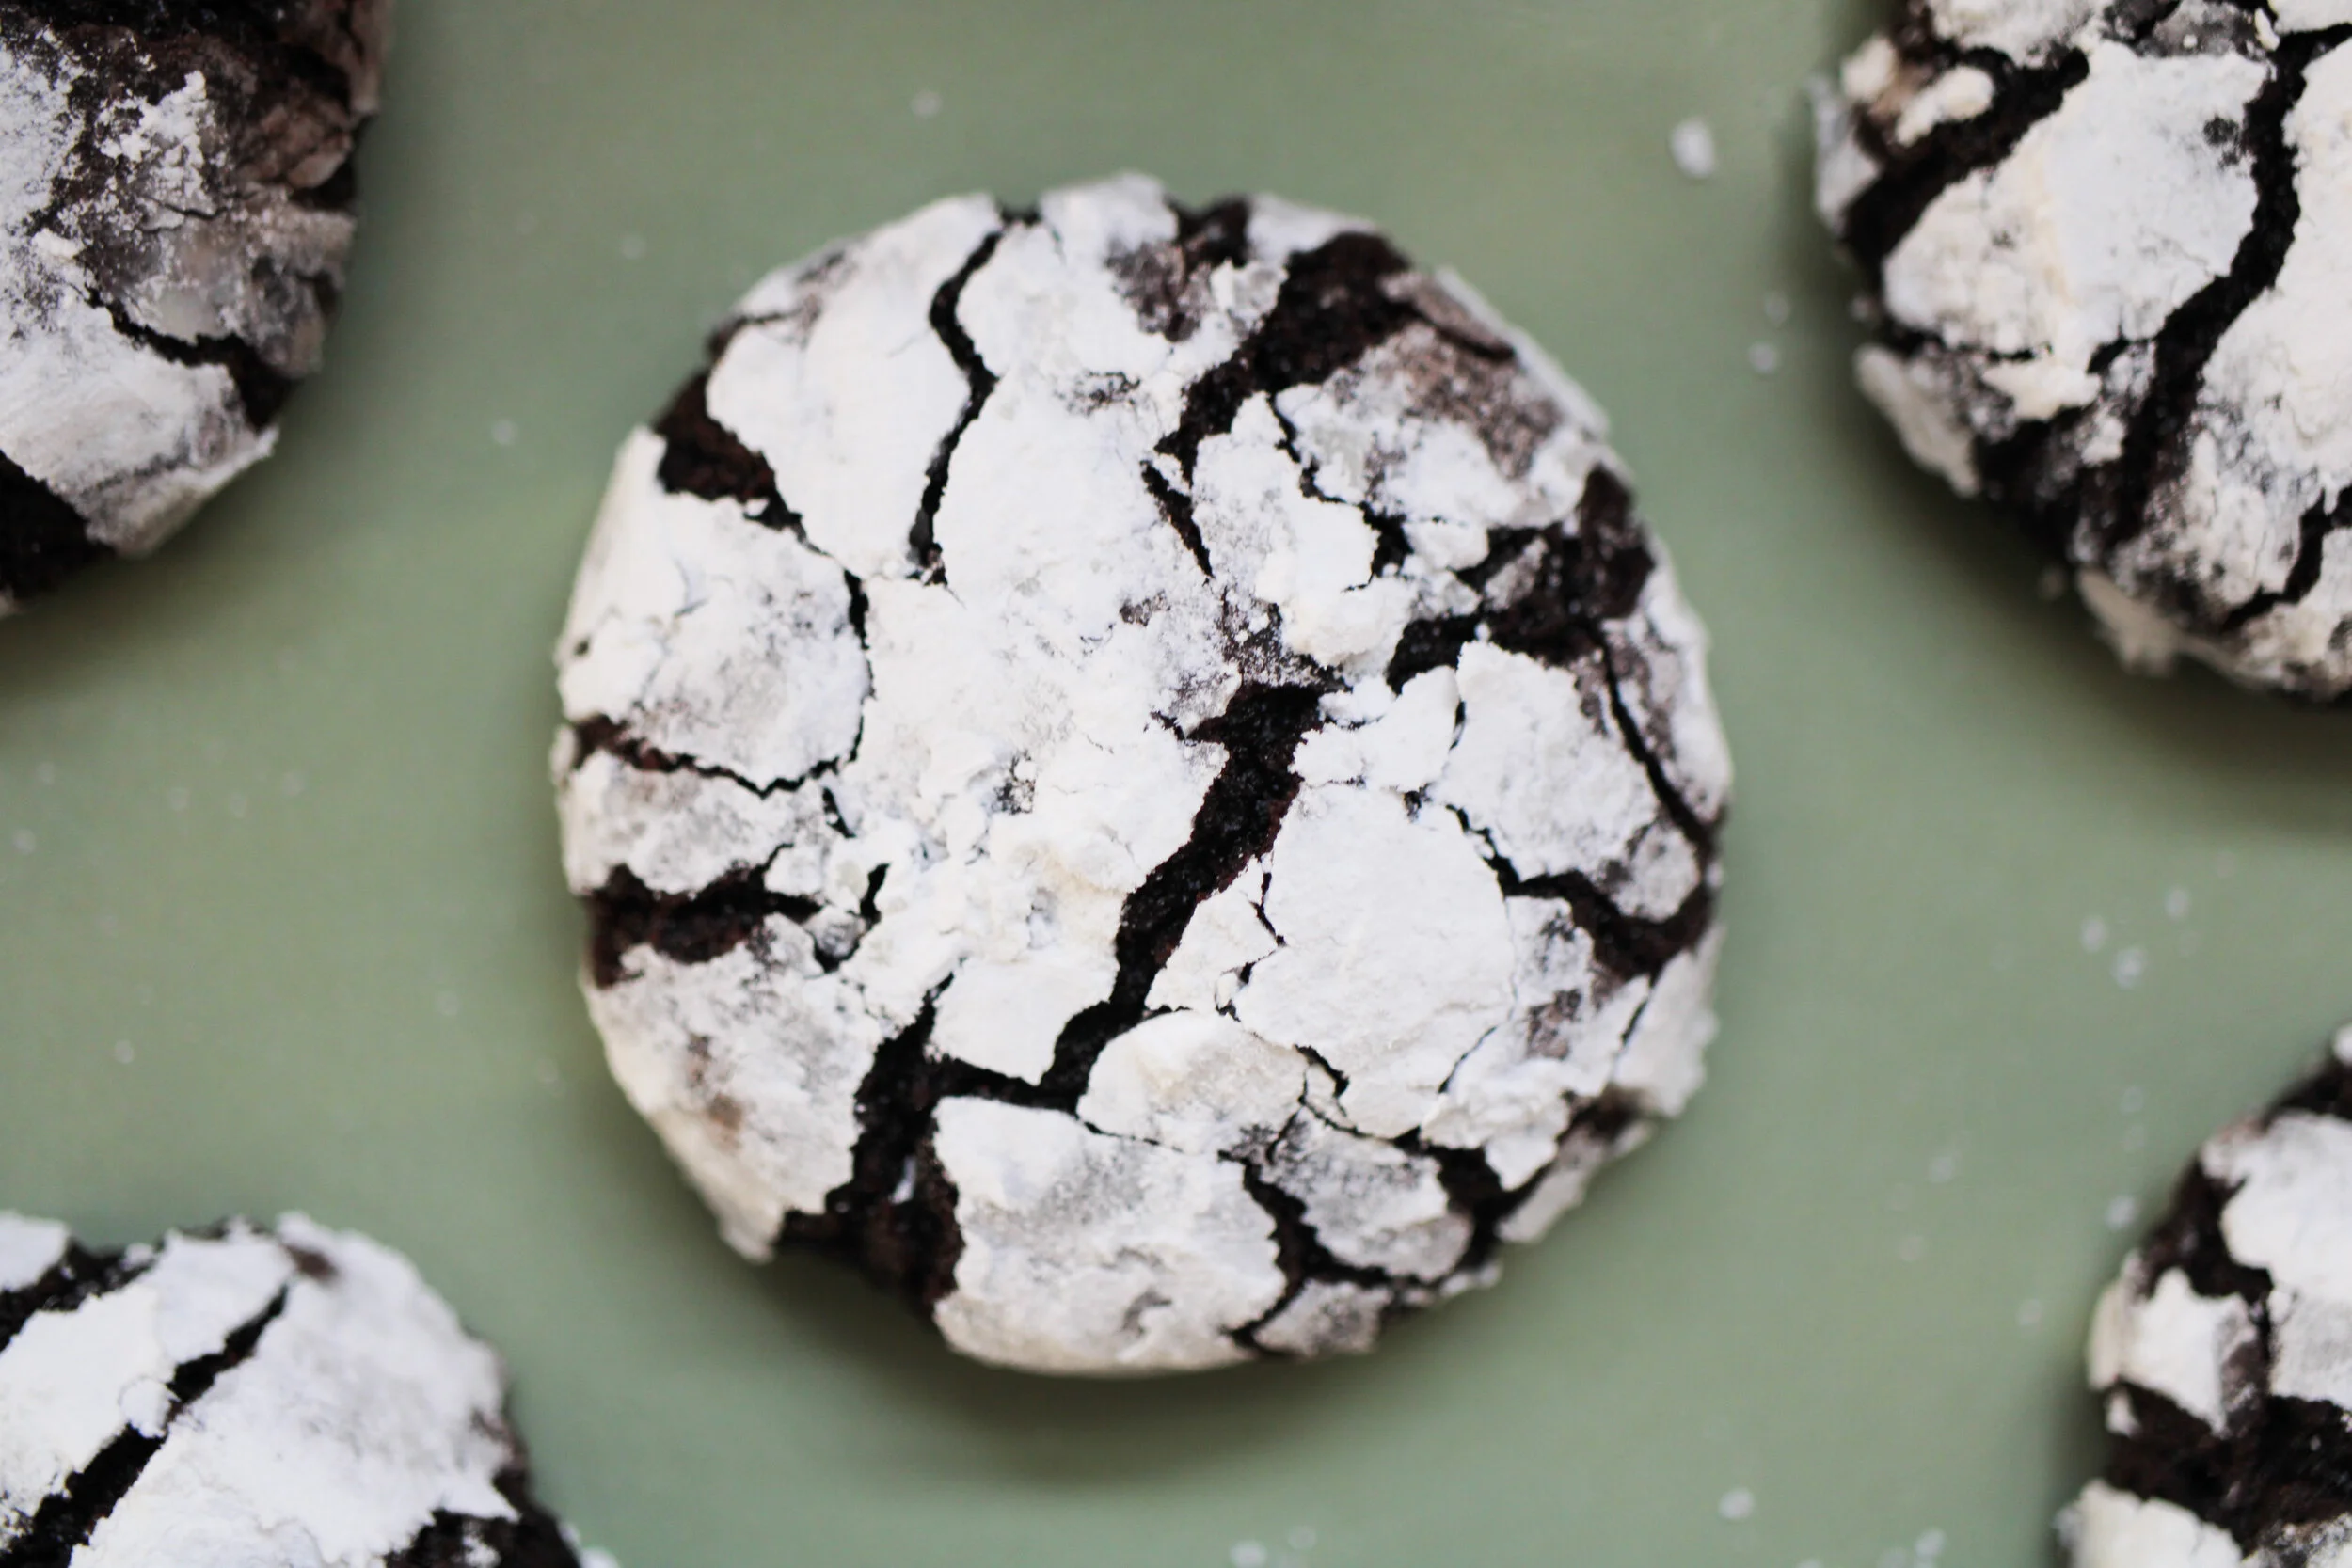
These are calming CBD cookies with a surprise almond center.
You may have read, but I have a small CBD business called Pacha that carries CBD products for all, including pets.
Recipe
Yield: 20 cookies at 50 mg each
Ingredients
1/2 cup unsweetened cocoa powder
1 cup white granulated sugar
1/4 cup coconut (or vegetable) oil
1 gram Pacha CBD Isolate
2 large eggs, room temperature
2 teaspoons coconut extract
1 cup all-purpose flour
1 teaspoon baking powder
1/2 teaspoon salt
20 toasted, whole almonds
1/4 cup powdered sugar
Directions
1.In a medium-sized bowl, mix together coconut oil and Pacha CBD Isolate until smooth and there are no lumps. Next, add the cocoa powder, and white sugar. Mix very well. Mix in eggs, one at a time, until fully incorporated. Next, mix in coconut extract.
2. In another bowl, combine the flour, baking powder, and salt. Mix all with a whisk. Stir the dry ingredients into the wet mixture just until a dough forms (do not over beat). Cover bowl with wrap and refrigerate for at least 4 hours or overnight.
3. When ready to bake, preheat oven to 350°F. Line 2 baking trays with parchment paper. Roll 1 Tablespoon of dough into a ball. Continue making 20 balls total. Make a dent in the middle, add one almond and re-roll into a smooth ball making sure the almond is hiding.
4. In a small bowl, sift in the powdered sugar. Generously and evenly, coat each ball of dough in the powdered sugar and place onto prepared cookie sheets 2 inches apart.
5. Bake in preheated oven for 10 minutes. The cookies will come out soft from the oven but will harden up as they cool.
6. Allow the cookies to cool for at least 10 minutes before eating. Store extra cookies in an airtight container at room temperature.
Vegan Fruity Pebble Cookies

Recipe
Yield: 10
Ingredients
3/4 + 1/8 cup all-purpose flour
2 Tablespoon corn starch
1/4 teaspoon baking powder
1/4 teaspoon baking soda
1/4 teaspoon salt
1/4 cup (4 Tablespoon) unsalted vegan butter, cold and cubed
1/4 cup (packed) brown sugar (either light or dark)
1/8 cup white granulated sugar
2 flax eggs
1/2 cup Fruity Pebbles cereal, plus extra for sprinkling on top of cookies
Directions
______________________________________________________________________________
In a large bowl, whisk together all-purpose flour, corn starch, baking soda, baking powder, and salt. Set aside.
In the bowl of a stand mixer fitted with the paddle attachment, or a large bowl using a wooden spoon, break up and cream the butter until smooth, fluffy, and paler in color. This takes about 1 min.
Add both brown and white sugar to the butter and mix until well incorporated. With a spatula scrape the sides and bottom of the bowl making sure everything is incorporated.
Add the flax egg and mix until fully incorporated. Scrape all sides and bottom of the bowl.
On low speed, mix in the dry flour mixture beginning with only a 1/3 of the mix. Mix just until incorporated being careful not to over mix. Repeat with the next 1/3 of the flour mix. And lastly, add the last 1/3 along with the Fruity Pebbles. Mix gently making sure everything on the sides and bottom of the bowl is incorporated.
Prepare your oven: position a rack in the center. Preheat to 400 degrees.
Portion the dough with either a 1/2 cup scoop or using a scale if you want to be super precise. Roll each portion into a smooth ball.
Place dough balls in the freezer for 5-7 min or while the oven preheats.
On a parchment lined sheet tray, with the dough balls 2 inches apart, press the dough tops down using the back of a cup or any smooth surface creating a flat top. Sprinkle on some Fruity Pebbles and lightly press down on the cookies one more time to secure the cereal in place.
Place a second sheet tray, face down, on the center rack of the oven. Next, place the sheet tray with cookies on top of the flipped over one in order to prevent the bottom of the cookies burning due to the high temperature.
Bake for 8 minutes or until the sides of the cookies just begin to brown.
Allow the cookies to cool for 5-7 min.
Store the baked cookies at room temperature in an airtight container. You can keep some of the dough frozen to bake off later and will keep for months this way.